

JpegDigger features a JPEG repair option. What is this and what can it do? Repair will not per se result in a perfect image. It can however repair JPEGs to a degree where they can be opened and viewed, including their flaws.
JPEG structure
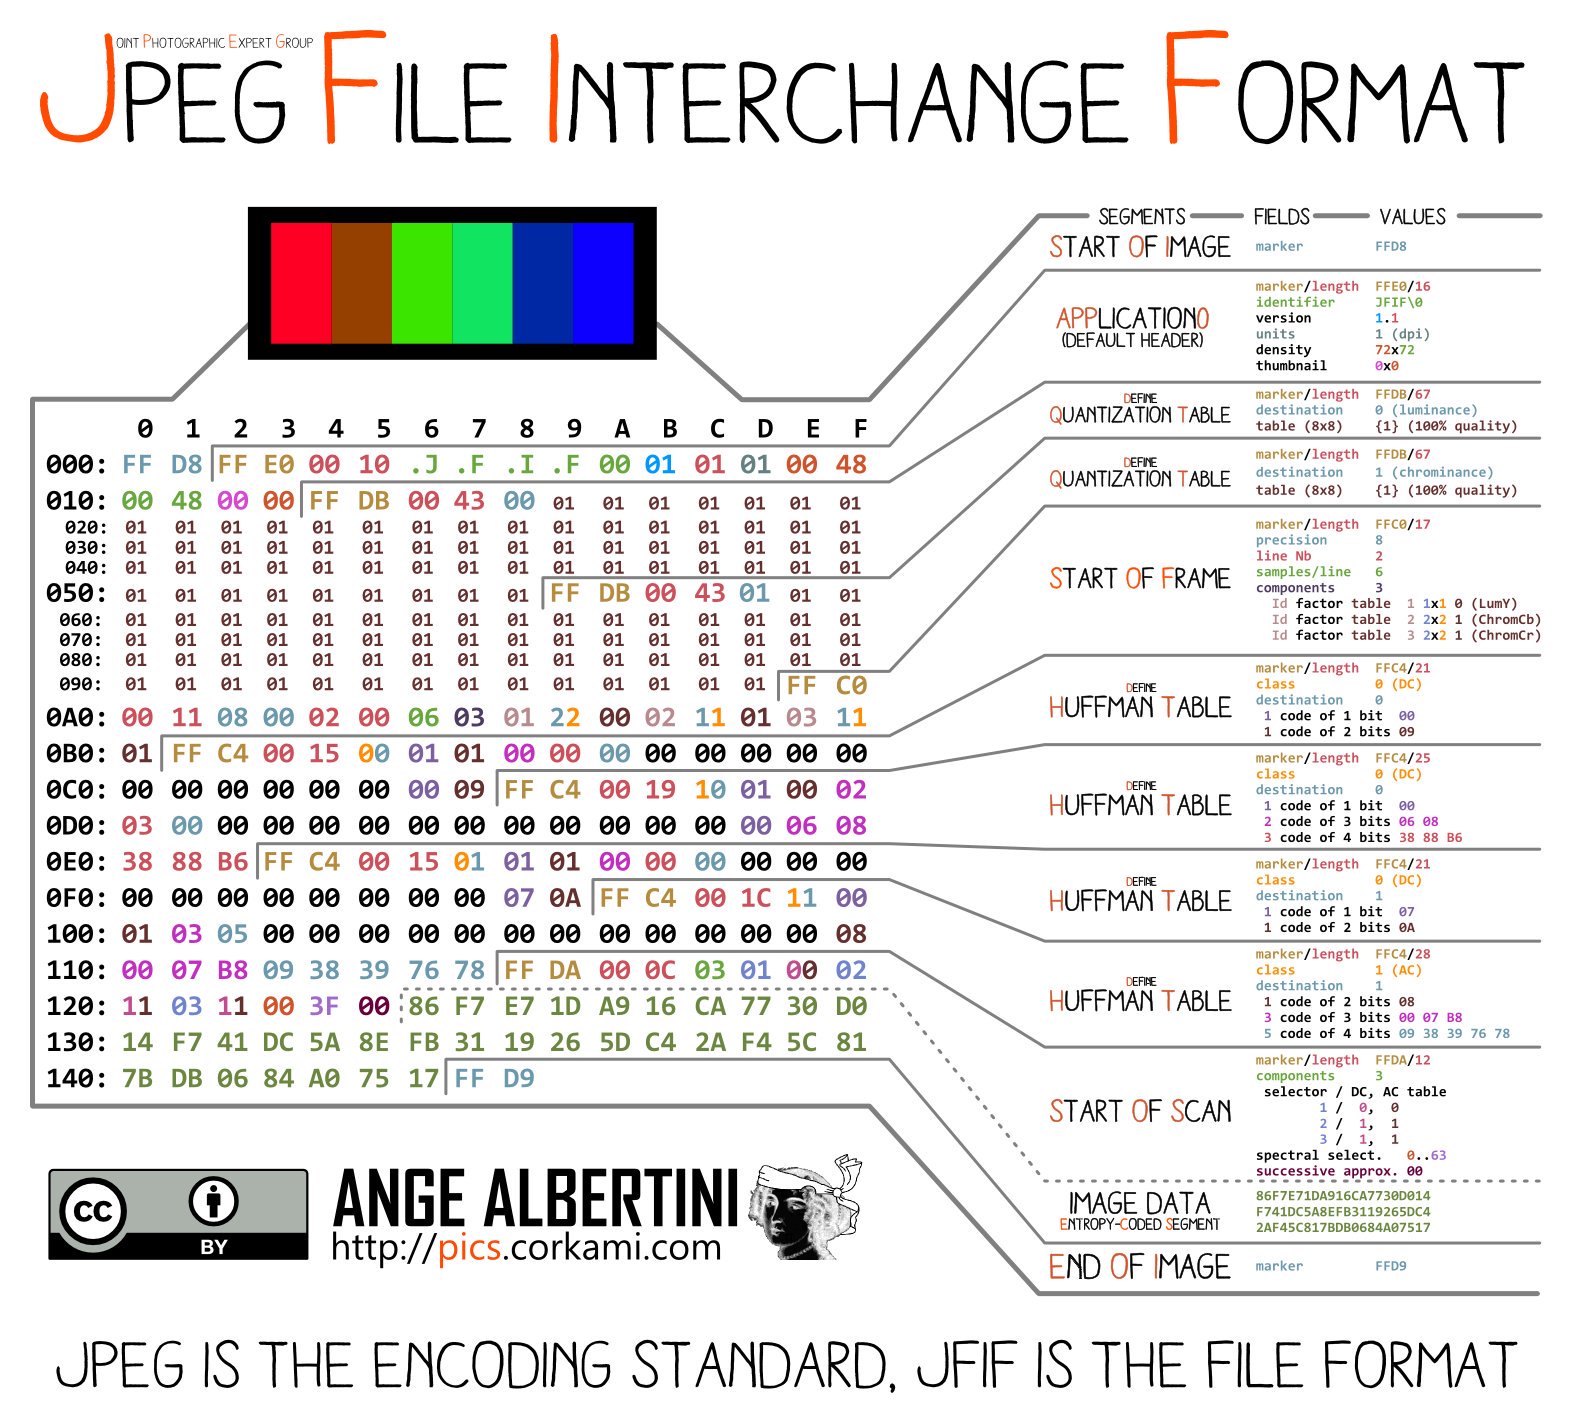
Let’s first look at how a JPEG file is organized internally. A JPEG is divided into several sections. Each of these sections is preceded by a marker which tells a JPEG viewer or decoder which section it is dealing with. We call these JPEG markers.
An example of meta data pointing to encoded image data ..
It can for example be a section that contains EXIF data. Or the section that contains the actual encoded JPEG data. Markers look like FF xx (hex), for example FF DA is the start of scan marker. Most markers (exceptions: FF D8, FF DA and FF D9) are followed by data containing the size of the section. So, this means you can calculate the position of the next marker. This is a list of possible JPEG markers.
Some markers do not include size, most notably the FF DA marker which precedes the section containing the encoded and compressed JPEG data. A decoder should simply keep decoding until the FF D9 (end of image) marker is encountered. It’s in this section where most visible corruption originates. Corruption in this section can for example make only half the image is visible, the other half is simply a grey block.
JpegDigger JPEG Repair
It’s this kind of corruption JpegDigger tries to detect and correct or repair. Again, this does not necessarily result in a perfect image. However, it repairs the image to a degree where it can be opened and viewed where other recovery tools would recover a partial image.
Example 1: Most software will recover this image due to corruption in encoded/compressed image data (FF DA section). Bottom 25% is just a grey block.
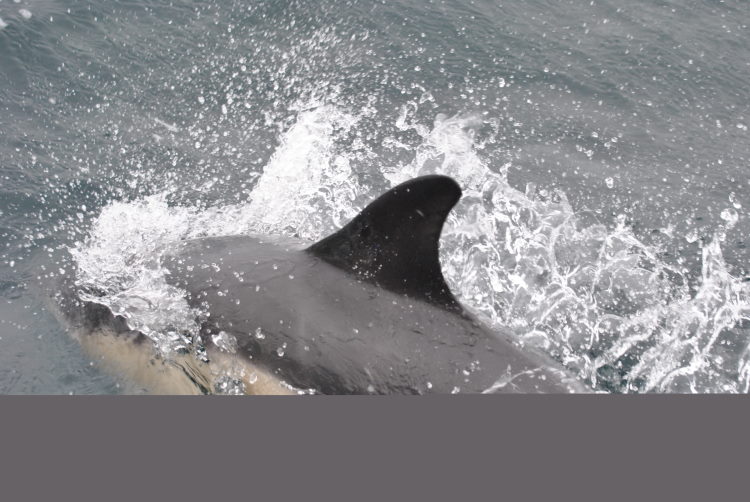
JpegDigger recovers it like this after on-the-fly repair:
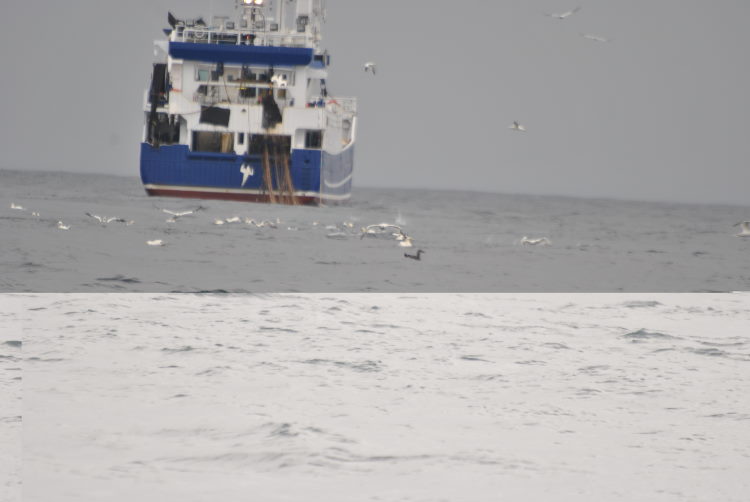
Example 2: Other software recovers this corrupt JPEG like this. Almost entire bottom half is a grey block.
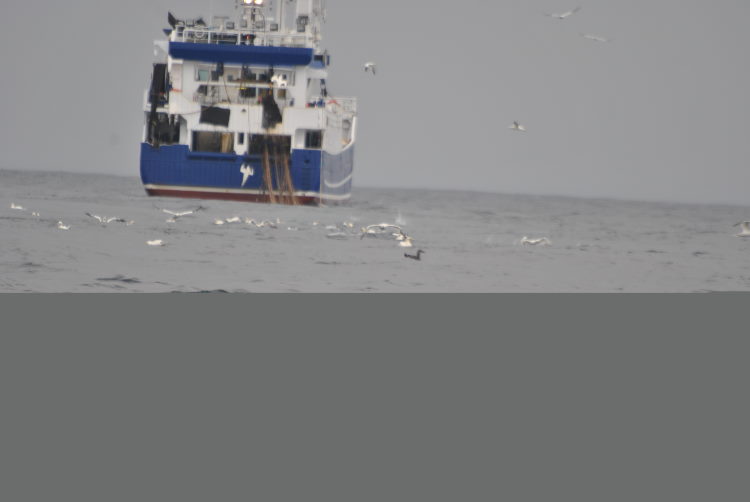
JpegDigger on-the-fly repair gives us this:
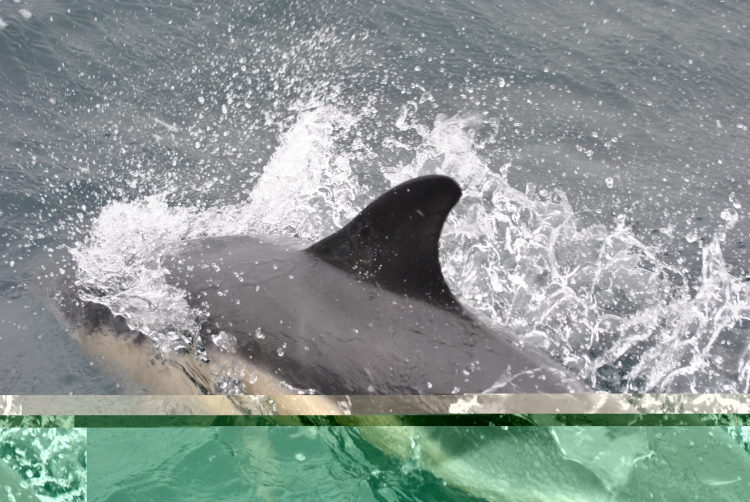
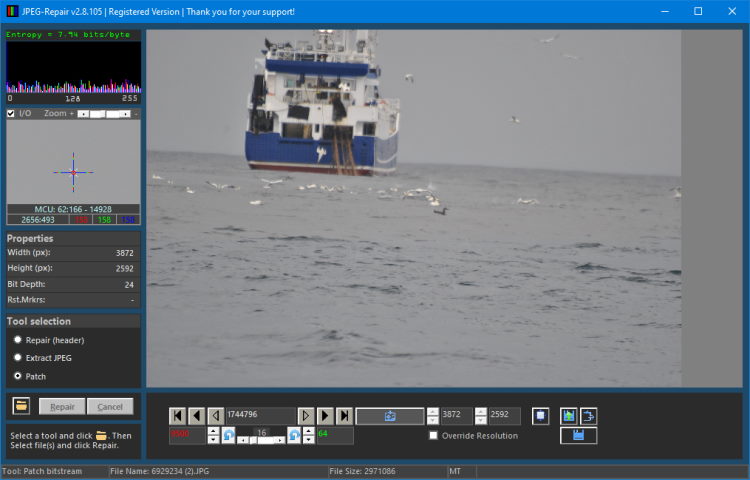
Using JPEG-Repair we can further improve these photos:
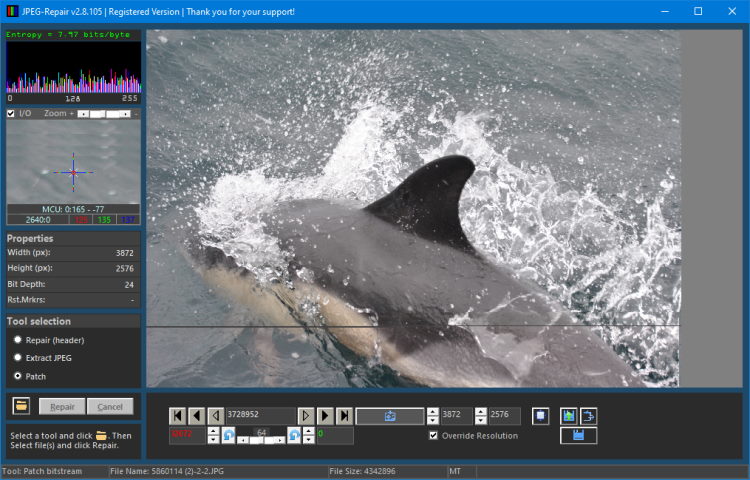
And …
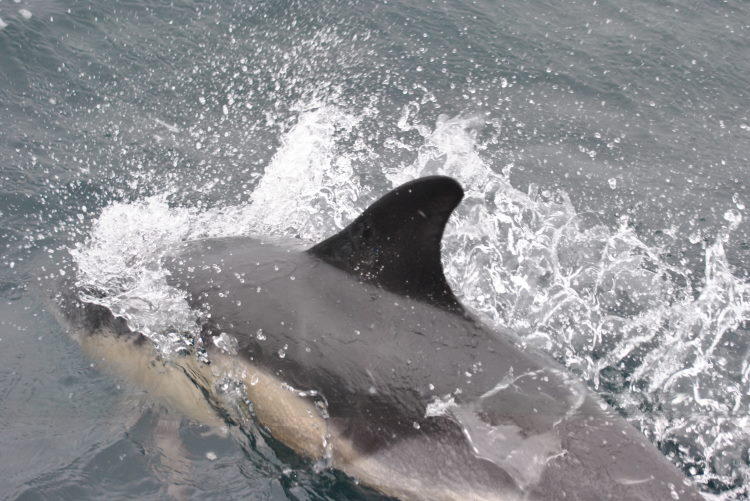
The shark picture shows a horizontal grey line that is a result of the repair, it is easily masked using an inpaint or heal tool.
Conclusion: Recovered half grey photos? Try JpegDigger
As shown the automatic JPEG repair feature built into JpegDigger can not perform magic. There is no AI involved that can evaluate if a photo looks right. It can only repair issues that violate the JPEG specification. Most of the times it does not repair photos to perfection, but only to a degree where they can be viewed in a photo viewer or editor. If you’d be using different software you may be led to believe half the image is simply missing, perhaps due to it being partially overwritten or file fragmentation.
As demonstrated, the imperfectly recovered files may be improved using JPEG-Repair and photo editing software.
Hi, I paid and downloaded JpegDigger and Jpeg Repair. The Jpeg Digger app isn’t responding and I haven’t been able to use it. I opened the app, selected the g drive, and selected Scan. It acts like it’s going to work but it’s “Not Responding”. Is there an update I’m missing for the app?
Thanks,
Michelle
Hello,
What type of medium is this g drive (is it SD card, USB flash drive etc.?) and what’s the size? What happened to the data, how was it lost?