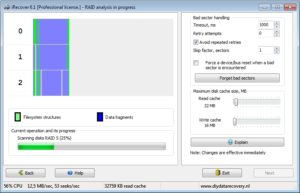
Reclaime Free RAID Recovery (www.freeraidrecovery.com) is a RAID recovery utility that detects parameters for broken RAIDs. Although it is free to use, additional steps are required when using it to recover data from a broken RAID.
Once the parameters are detected you have to either:
- Write a copy of the RAID somewhere if all RAID’s content is needed – or –
- You can use additional data recovery software to recover data from the broken array directly, using the array parameters provided by the Reclaime software. Reclaime RAID Recovery can produce step-by-step instructions for R-Studio, File Scavenger, UFS Explorer, and Zero Assumption Recovery software.
- Of course ReclaiMe File Recovery Ultimate offers seamless integration with Free RAID Recovery.
Using iRecover with Reclaime Free RAID Recovery
If you already have an iRecover license you can use iRecover to process the parameters as detected by Reclaime Free RAID Recovery, by simply following the instructions provided for Zero Assumption Recovery (ZAR).
Note that the use of Reclaime Free RAID Recovery is not a requirement for iRecover to rebuild a broken array, as iRecover is capable of detecting the array parameters automatically!
These example instructions are provided by Reclaime for data recovery from a WD Sharespace RAID 5.
Launch iRecover.
Click "Data Recovery for Windows and Linux". We will use the data we got from Reclaime to define the RAID.
Right click anywhere in the disk list, select "Define RAID manually".
From the "Available drives" list, select "Disk 2 - WDC WD10 EARS-00MVWB0", then click "Add".
From the "Available drives" list, select "Disk 1 - WDC WD10 EARS-00MVWB0", then click "Add".
From the "Available drives" list, select "Disk 3 - WDC WD10 EARS-00MVWB0", then click "Add".
Next to the "Array members" table, click "Add parity".
From the "Array members" table, select the last entry (ID 0500).  Click "Move up" 3 times. Verify that the parity drive (ID 0500) is at row 1 (the top row is number 1).
On the right side under "Array configuration", set "RAID type" to "RAID5 (MS/LDM)".
Below that, set "Stripe size" to "128 sectors".
Below that, set "Parity start/rotation" to 3/3.
In the "Array members" table, enter "48,1953523055" as "Start, Size" in all rows.
Set "Parity delay, stripes" to 1.
Set "Stripes in first delayed block" to 1.
Click "OK". A warning message may appear stating that "Starting sectors and sizes are incorrect". Click "OK" to dismiss the message box, then click "OK" on the manual RAID setup form again to close the form.
In the device list, "Virtual RAID #0" is the newly created RAID. Double click it to start recovery.

Generated by ReclaiMe Free RAID Recovery.
