

Send me a disk image.
See instructions at the bottom of the page for creating a disk image. If you have any problems, let me know! Contact me using form below and provide with the URL which I can use to download the disk image. Use a service like Google Drive, or alternatively a service like GoFile (free).
Creating a disk image yourself
The idea is that you create a sector-by-sector drive image of the memory card or USB flash drive. In general this image is the same size as the device you’re imaging, so an image file of a 32 GB SD Card will be 32 GB in size. You then upload the image to a file sharing service and send me the shared URL. I then download the file and recover your files.
PC:
You can use the demo version of JpegDigger or ReclaiMe.
JpegDigger:
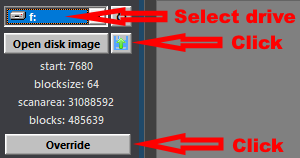
Insert the card into the reader. Open JpegDigger and select drive letter assigned to the card.
Click the Disk Image button (next to Open disk image). If override dialog does not open, click Override.
Check ‘Manual’, set start sector to 0. Click OK.
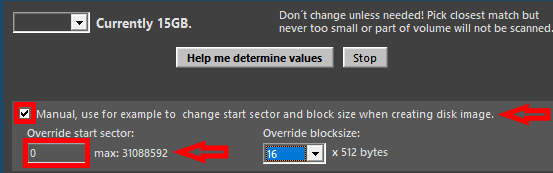
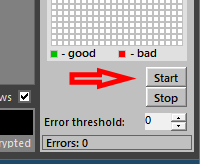
Click Start. You’ll be asked to select a location and image file name, for example ‘mysdcard.img’.
Mac:
- Insert the memory card into a USB card reader and connect the reader to the computer. If your laptop has a built-in SDHC card slot you may use this in place of an external card reader.
- Open Applications > Utilities > Disk Utility
- In the left window pane, select the memory card
- Select New Image from the top tool bar
- Name your new disk image and select a destination for it.
– Image Format: read-only
– Encryption: none
– Click Save
Disk Utility will ask you to enter your computer’s admin password to continue.
An exact copy of the memory card will be created. Upload the .dmg file using a file sharing service and share the URL with me.