

JPEG Recovery LAB Quick Start
JPEG Recovery LAB is primarily designed for recovery of digital photos and video from memory cards. It can however also be used to recover files from hard disks. Expect hours for a recovery rather than minutes.
It only recovers specific file formats:
- JPEG images
- CR2 Canon raw image files
- NEF Nikon raw image files
- Certain variants of MP4, MOV, AVI and MPEG-2 video files
Setting up for a recovery
JPEG Recovery LAB accesses the source medium intensively. Therefor a slow device means that the recovery will take longer. To speed up disk access consider:
- Using a card reader rather than connecting a camera to the PC directly. They are faster and handle bad sectors better.
- Imaging the card. ReclaiMe (the demo version will do fine) for example can be used to create a VHD image of a memory card. Once you have the image file you can mount it (right click > Mount) so that it will be assigned a drive letter. You can not scan the drive (VHD image) like any other drive.
- Pick the beefiest PC you have available (more CPU cores, more memory is better. Pick number of cores over CPU speed) Make sure you do not need the PC for a couple of hours. Also, the PC needs to be connected to the internet.
Power-save settings
As recovery using JPEG Recovery LAB will take some time, it is important to configure power-save settings correctly to prevent the PC from going to sleep or perform reboots etc..
Update: JPEG Recovery LAB itself takes steps to prevent system shutdown.
Running and installing JPEG Recovery LAB
You can install and run JPEG Recovery LAB like any other software. The setup and software are not signed. As the tool is frequently updated Windows SmartScreen or Windows Defender may warn you that the software is unrecognized. In this case click ‘More info’ > ‘Run anyway’.
JPEG Recovery LAB is quite a different beast compared to simple photo recovery and undelete software. To reconstruct and validate images it actually needs to do a lot of computing. It needs to keep track of clusters it processed and which files are assigned to it which consumes memory. Also, rather than skimming over the disk just once it goes back and forth trying different combinations. So, in other words, it will really put your PC to work.
Is JPEG Recovery LAB hanging?
It’s not uncommon for JPEG Recovery LAB appearing to be doing nothing at all. For example, “Computing initial point for nnn files” may sit at 0.0% for a long time.
As long as the graphs on the Resource usage TAB displays activity, JPEG Recovery LAB is working. So, if you want a chance to get those fragmented files back you will just have to be patient.
Selecting the source
Although JPEG Recovery LAB does not need a file system, being able to determine one offers several advantages. It is therefor recommended to scan a volume with a drive letter assigned. In general Windows assigns drive letters to volumes it can recognize. But also to mounted VHD image files. When a drive letter is assigned JPEG Recovery LAB may be able to:
- do cluster aligned scans rather than sector aligned which is faster
- Distinguish between used vs unused clusters which is helpful is you are only after deleted images or videos.
Both may result in a improvement in speed in certain scenarios. But RAW sector by sector disk (SD Card) images can be processed as well. JPEG Recovery LAB is not designed to repair individual photos!

Now select either a physical device or disk, a volume (anything with a drive letter assigned) or click ‘Open disk image’ to load a RAW disk or volume image file file (NOT an individual JPEG). Then click ‘Proceed’.
Settings – See settings for details
In general for processing memory cards leave settings as they are.

There are a few that can make life easier and improve speed.
If you only need to recover deleted photos or video:
On a file system there is allocated space and unallocated. Allocated means, the space is in use by a file. Deleted files do not occupy allocated space because if you delete a file, the space where the file was stored is marked unallocated.
So, check the box to scan unallocated space only.
If you barely meet system requirements:
8 GB of RAM is the minimum memory requirement for JPEG Recovery LAB. If you have more than 8 GB of memory installed leave settings as they are. If you have 8 GB of RAM, limit the number if parallel processes to 2.
If you need to recover files from a hard disk:
When it comes to recovering fragmented files, JPEG Recovery LAB needs to find all clusters that belong to a single file. The more clusters, the more work. The bigger the device, the more clusters.
To limit the amount of clusters JPEG recovery LAB has to go through you can configure the locality setting. Locality tells the program to assume matching clusters are near by (last known fragment). This will reduce time needed / taken by JPEG Recovery LAB.
Limiting locality to 25% (for example 5% forward, 20% backward for example improves speed 4 times.
Analysis
JPEG Recovery LAB shows a progress screen.
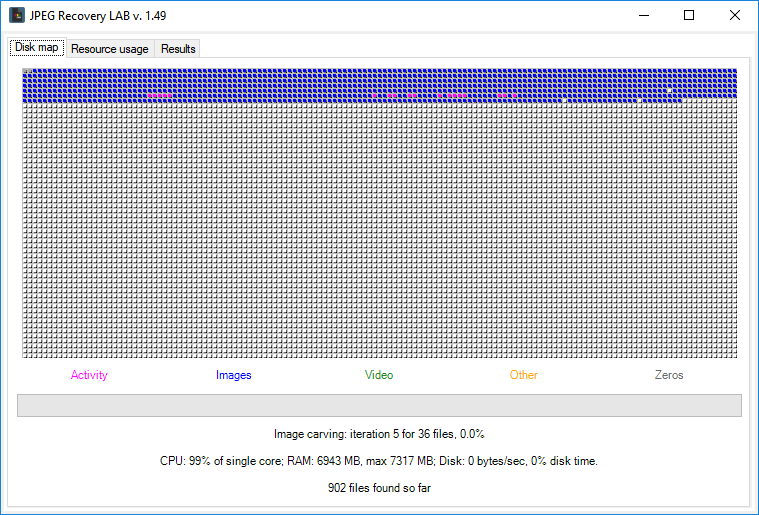
For each phase it will show a percentage done. For much of the work no ETA is possible.
During the media scan it is normal for number of files found to be zero so no need to be alarmed by this. Only further on in the process when JPEG Recovery LAB is certain about a file, it will add one to the counter. As files are found the results TAB can be pulled up to view the files. Copying files is only possible with a licensed version.
File selection TAB
Organizing files
Click change grouping to organize files. You can add a sorting method by simply dragging an option from the right side box to the left side box. If you for example want an accurate division between intact, fragmented and damaged files, drag Status from right to left and click ‘OK’.

Previewing files, properties and copying
Previews
JPEG Recovery LAB generates previews on-the-fly using the actual image data. So, what you see is what you get.

Properties
You can view various properties for a file, such as resolution, camera make and model (if available) and whether a file is contiguous, fragmented or damaged.

Copying
To recover files, simply check desired files and folder and click ‘Copy selected’. If you have not entered a license key JPEG Recovery LAB will ask you to do so now. Use copy & paste to enter the license key you received at the end of the order process or by email.
