

In these articles, here, here and here, I test various diy data recovery software against an old disk I dug up. In this article I will dig a little deeper into this so we can analyze what’s the trouble with this disk. This article will get a bit technical but it follows very simple logic, so give it a try.
Test results:

Post 1 – Data Recovery from unknown Disk
- iRecover – passed test
- Recover my Files – failed test
- Easeus Data Recovery Wizard – passed test
- Wondershare Data Recovery – failed test
Post 2 – Data Recovery from unknown Disk
- HData Recovery Software – failed test
- Data Rescue PC 3 – failed test
- Ontrack Easy Recovery – passed test
- Minitool Power Data Recovery – passed test
- Tenorshare Data Recovery – failed test
- Coolmuster Data Recovery – failed test
- Asoftech Data Recovery – failed test
Post 3 – Data Recovery from unknown Disk
- Disk Drill – failed test
On to the disk
The disk in Windows Disk Management shows as unallocated and I am prompted to initialize disk’.
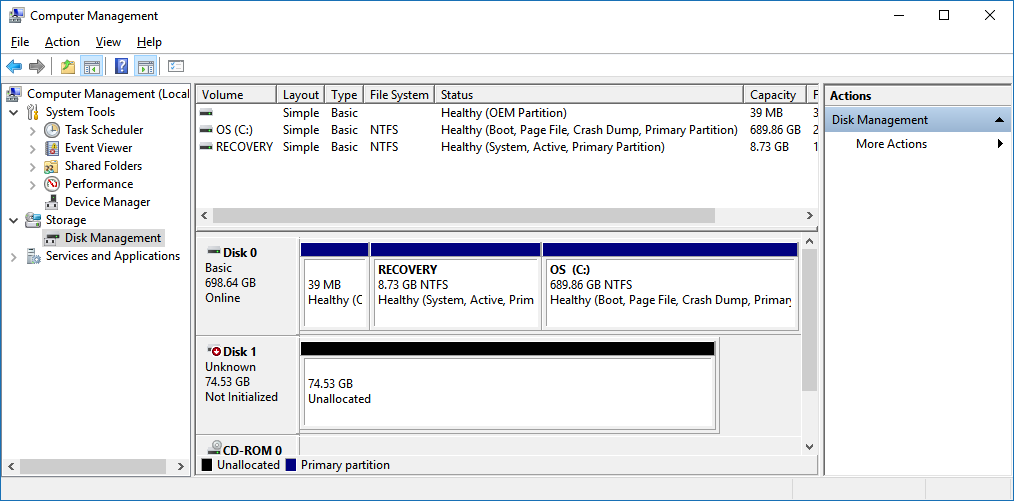
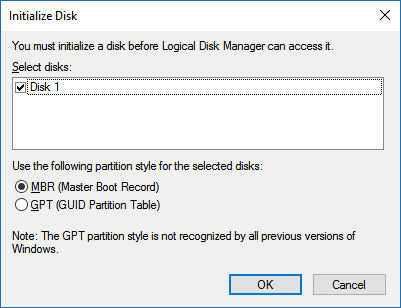
Disk Management prompts me to “Initialize Disk”
The first thing I always do when I get a disk that is unallocated as Windows disk management calls it, is have a look at the MBR. The MBR (Master Boot Record) is the first sector on a hard disk. It contains some executable code that is used to boot the PC when it’s fired up.
The boot code.
This executable code performs some checks first. One of the things it does is check if the MBR contains some signature bytes: The last 2 bytes of the MBR should read 55 AA in hex. And that is what I look for as well. If those bytes are missing the OS will assume that the disk is not initialized.
I have seen plenty of disks that appeared empty, while there was in fact a valid partition table, which is the 2nd part of the MBR. It was just as if there wasn’t one, because of those 2 simple bytes missing.
The partition table.
The 64 bytes prior to the 55 AA signature is the partition table. It allows for 4 partitions to be defined, so 16 bytes are available to define each partition.
Each entry allow the OS, or partition or utility software to determine the start position of a partition, it’s size, it’s type (file system: FAT, NTFS etc.). There is also room to set a flag for the active partition (so it is set to boot from – max one partition of course).
Ok, back to our disk …
When I look at the first sector of the disk, it shows me zeros:
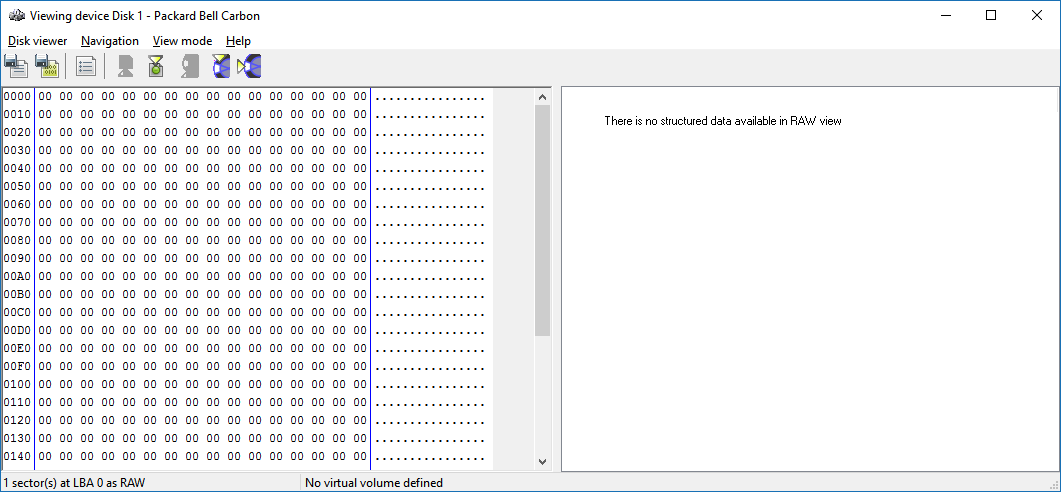
The MBR (sector 0) of the unknown disk
Because I know that all the software I have tested so far had no trouble finding a FAT partition, I look for a FAT boot sector which I find at sector 63 (logical block address or LBA 63).
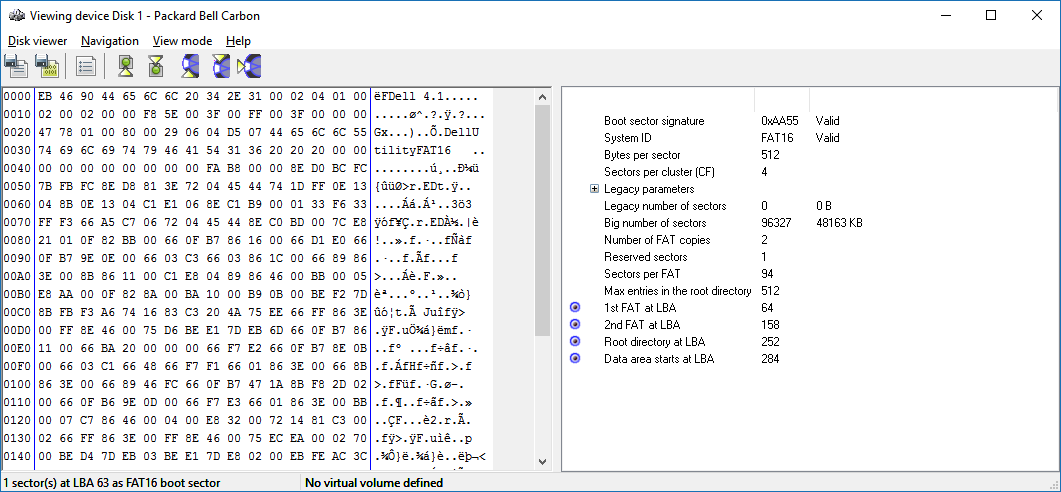
FAT boot sector at LBA 63
A boot sector.
Like the MBR, a boot sector contains boot code. It does not matter if we talk about a FAT or a NTFS boot sector. The executable code in the MBR finds the active partition, it then jumps to the first sector of the partition (boot sector). It then executes the code it finds in that sector.
The similarities with the MBR do not end here. Apart from the executable code, the boot sector also contains information the OS or utility software can use to interpret what is on the partition. It describes the type of file system like FAT 16 (you can actually see this info in the above screenshot as human readable text). It also contains info on where the various key components of the file system are located.
The software I used (iRecover) interprets this information and shows it to us in readable form. It shows us the location of the FAT (File Allocation Table), the backup FAT, the root directory etc.. For a different file system it will show different information. A NTFS boot sector for example it will tell us where we can find the MFT (Master File Table). Most file systems it will store the size of the partition in the boot sector.
Back to our disk again ….
Normally you’d expect the next partition to start in the area that follows the FAT partition. So a good location to start looking is at sector 63 (start sector FAT partition) + 96327 (number of sectors FAT partition) = sector 96390.
The disk viewer shows a NTFS boot sector at that address. The first problem shows itself if we look at the interpreted values in the right side pane of the disk viewer: the ‘number of sectors’ value. Although the boot sector appears structurally valid, making that it should be easy to spot for the partition scan detection routines of the data recovery software tested, the partition is too large for the physical disk. The disk is about 80 GB, while the partition’s size would translate to over 140 GB. it is very well possible that the tested software ignores the partition because of this.
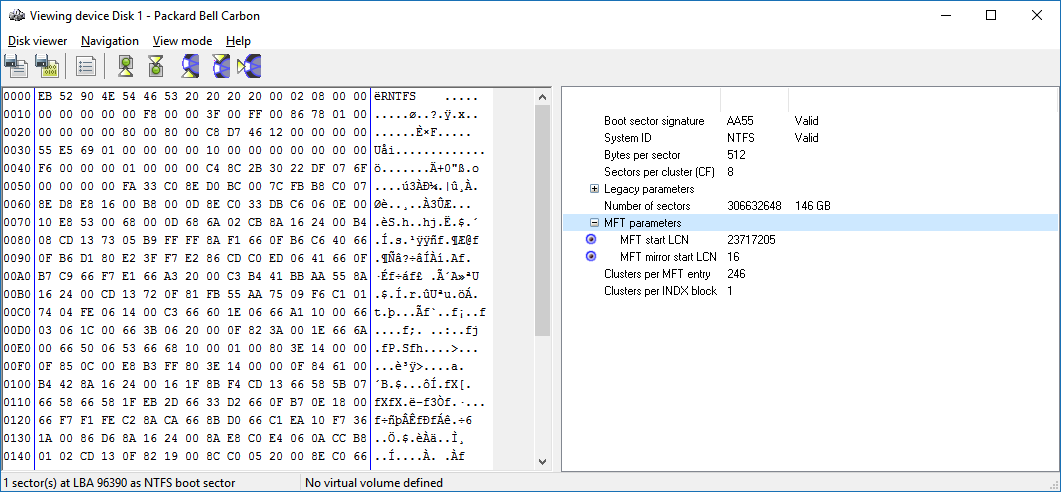
NTFS boot sector on unknown disk
Again using the right side pane in the disk viewer you can click the interpreted values to jump to the location it points to. So, by jumping to the MFT start LCN (logical cluster number) you get at the first sector of the MFT.
But there’s a problem with that too. If you take the offset of the partition (start sector) and add the LCN multiplied by the sectors per cluster value, you end up with a sector address that is beyond the end of the physical disk.
Let’s dig even deeper …
So, the boot sector is too unreliable to use for data recovery. Well, for anything actually. Still. Let’s dig deeper. The MFT mirror is within our reach, and this is a copy of the first few file records of the MFT (not a backup of the entire MFT!). By examining that we find that the MFT is fragmented. And although the MFT starts at a cluster that’s physically beyond then end of the disk, the start of the largest fragment can be accessed as it is actually on the disk.
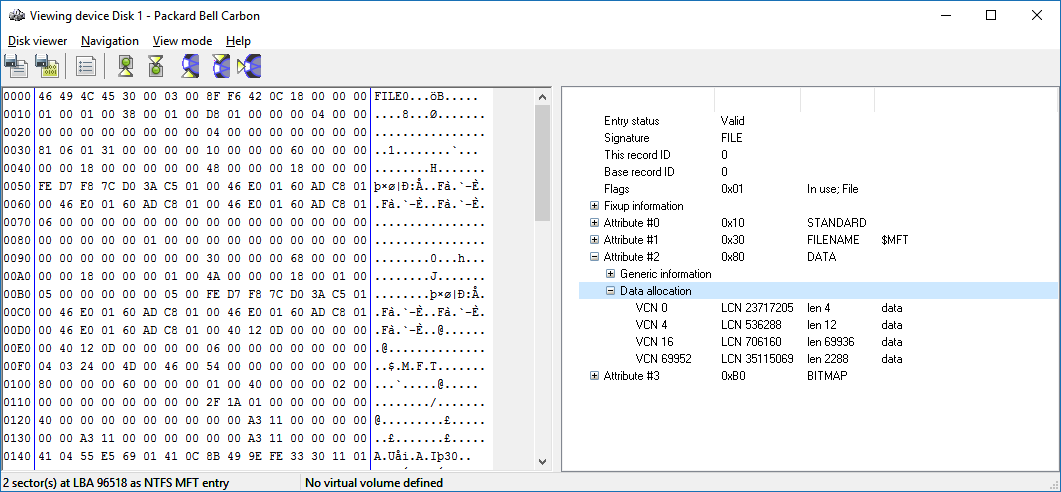
The entry for the MFT in the MFTmirror
Still with me?
Ok, what this all tells me.
Using this large chunk of MFT all files are located inside the first 80 GB of the disk are addressable and recoverable.
IMO a scenario like this separates very good diy data recovery software apart from simpler written data recovery software. What seems to have happened here (DIY Data Recovery from an unknown disk) is that the simpler software was intelligent enough to dismiss the boot sector.
I can not look at the code of this software, but it appears as if without a boot sector (or the user) telling the software – hey we’re scanning a NTFS drive – , it simply defaults to a RAW file carving mode of operation.
The better software keeps all options open. It just scans the entire area for file system structures for all file systems it supports. I know for a fact that is how iRecover works. Then when finding large chunks of MFT it decides on NTFS.
Combining all the data it gets from the chunks of MFT and an intact MFT mirror it can derive the start of the lost volume and it’s cluster size.
So, what happened to this disk anyway?
I think I know what happened. I often test our software (from www.diydatarecovery.nl) on scrap disks. And I think this is a scrap disk that I used for cloning. I probably cloned a larger disk on to a smaller disk. Just to test the disk copy routines. It makes sense because of what we see on this disk. And because I did that all the time.
Doesn’t this make the test of DIY Data Recovery Software useless?
IMO the answer to the question is: no. It so beautifully demonstrates the tested software’s capacities to think outside of the box. And it demonstrates how the ‘simpler’ software relies on easy to find disk structures, and how this software fails because of a single point of failure.